Choosing Flight Altitude
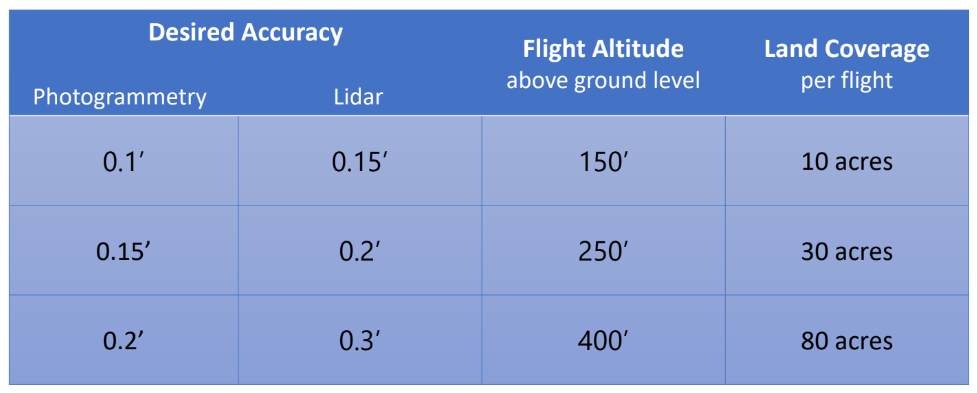
The tighter the accuracy you need, the lower you will need to fly your drone. The table below shows expected accuracies at varying altitudes, given that ground control is set accurately and represented precisely.
Photogrammetry Accuracy estimates assume the sensor is 20MP with a global mechanical shutter. Lidar Accuracy estimates are based on the Zenmuse L1 sensor.
As you can see, as we fly higher, we can cover more area with fewer batteries and less time overall, while compromising some accuracy. It is important for you to consider tolerances and account for the extra time and more batteries it will take to fly at a lower altitude.
Site topography and structures should also be taken into consideration when choosing an altitude to fly at. You want to make sure you are flying at LEAST 50’ above the tallest obstruction on your site for safety and at least 100’ above the highest topo point you are trying to map to avoid insufficient overlap in your photo data. To avoid overlap issues as pictured below, take off from the highest topo point on the site, or use the Terrain Awareness feature, found in Map Pilot or GSRTK.
In this picture, the drone drops to 75’ above the highest topo point, creating insufficient overlap in the area highlighted in red.


